Booting OpenVMS from a Fibre Channel Disk
Perform the procedures described in this section and configure UEFI to allow booting from a Fibre Channel disk.
-
At the
BOOTMGR>prompt, execute theEXITcommand.This will cause the UEFI firmware to reset. Interrupt the normal firmware startup by hitting Esc many times until the UEFI firmware menu appears. If the Boot Manager appears, repeat the procedure.
VSI OpenVMS Boot Manager: V9.2-* Build 160 ENABLED: Symmetric Multi-Processing ENABLED: Crash Dump Processing ENABLED: Legacy Serial Port Console for remote COM 1 ENABLED: Using Environment ROM Checking Required Processor Features: PASSED Identifying devices. This may take a while. COMPLETED VIRTUAL MACHINE GUEST: KVM (tm) No Mouse support; Use Command or Arrow Keys BOOT MANAGER DEVICE: DKA0 DEFAULT BOOT COMMAND: BOOT $1$DGA210 0x00 0x00000001 BOOTMGR> EXIT -
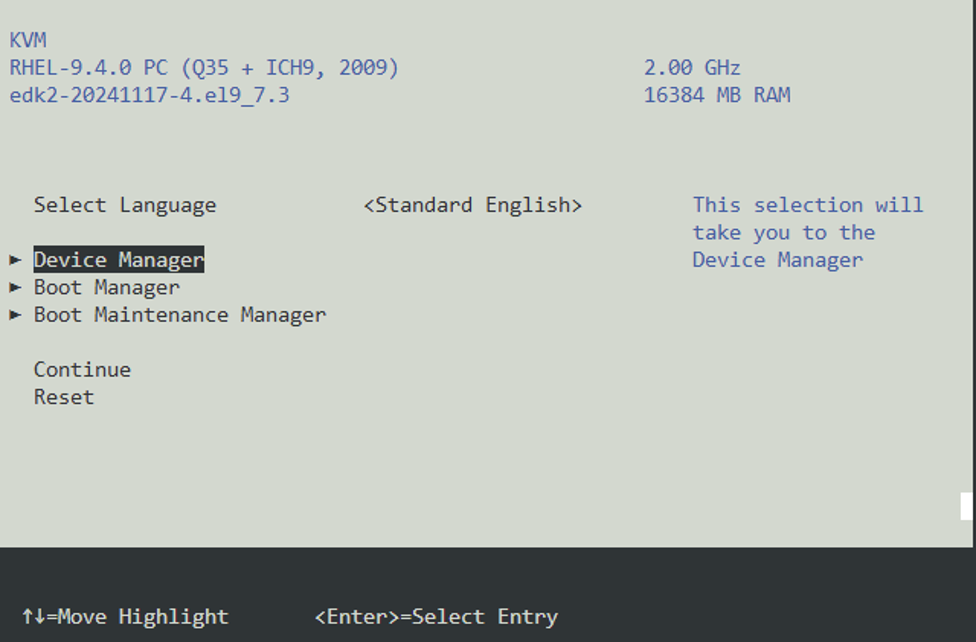
The UEFI menu will appear. Use the arrow keys to highlight the Device Manager and press Enter.
-
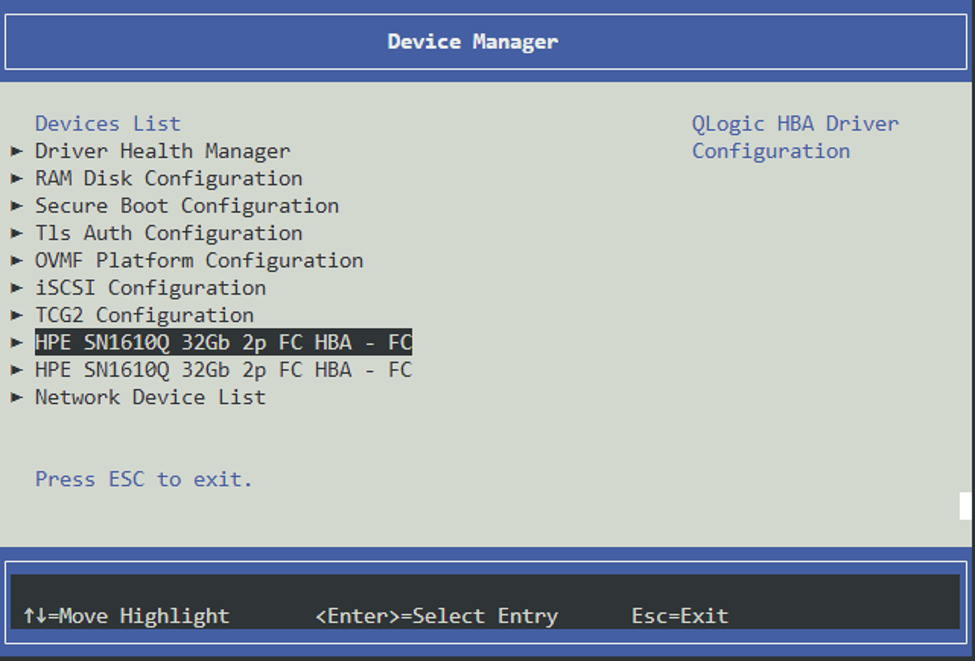
You will see the UEFI Device Manager screen. Use the arrow keys to highlight the first QLogic adapter in the menu and press Enter. Note that depending on your environment, the adapter model may be different.
-
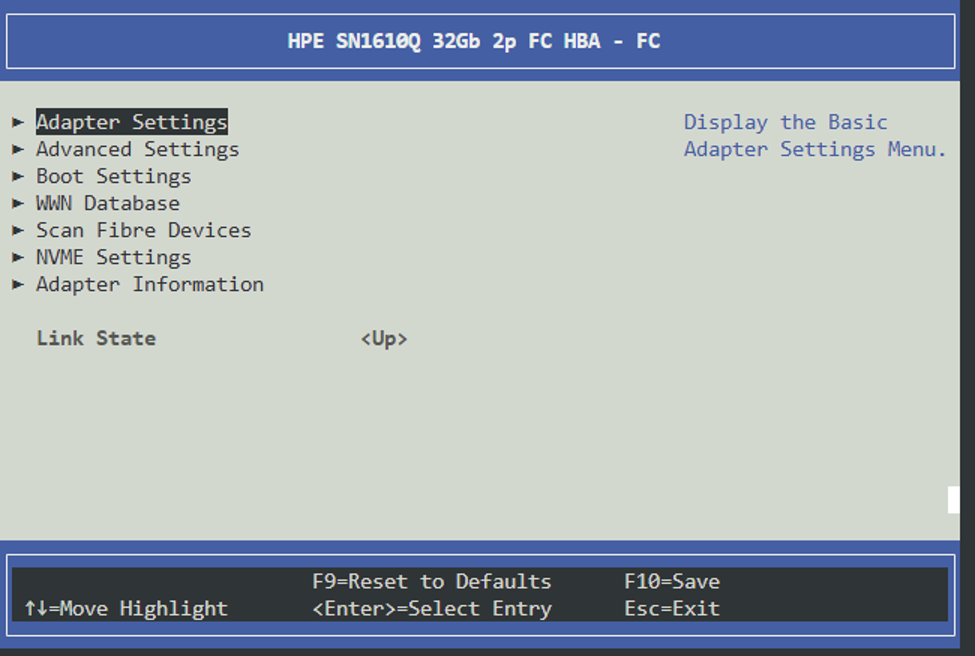
The UEFI QLogic Setup Utilities home screen will appear.
Note the Link State status. If the status is not <Up>, there are problems with cabling and possibly the Fibre Channel switch.
Select Adapter Settings.
-
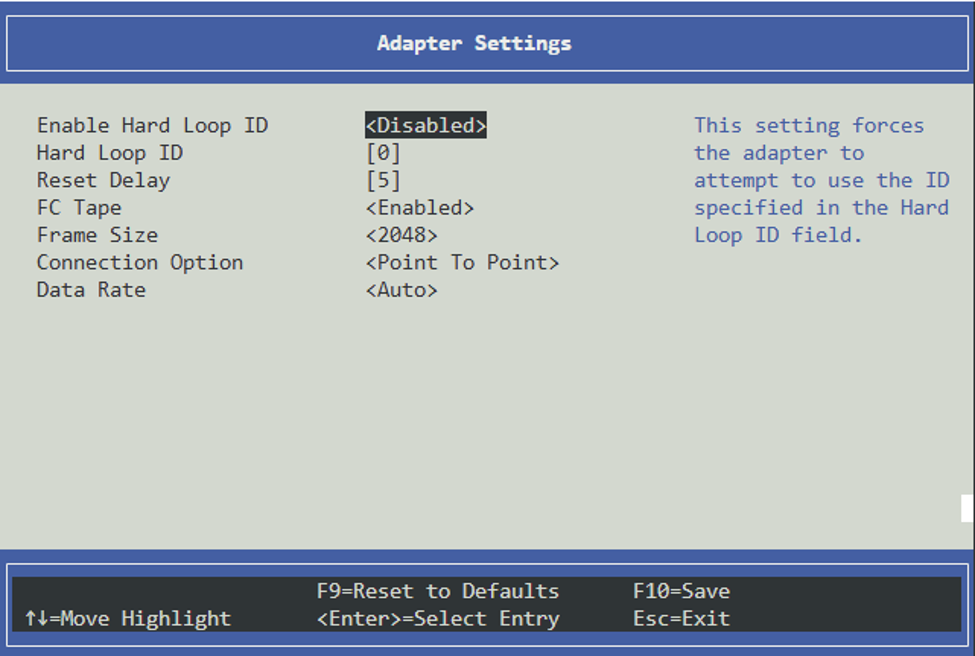
Use the arrow keys to navigate and change the adapter settings as indicated below.
Since OpenVMS does not support the Arbitrated Loop mode, it is critical that the Connection Option be set to <Point To Point> mode.
-
Press Esc to return to the QLogic Setup Utilities home screen. Select Boot Settings and press Enter.
-
Set the Boot Settings as indicated below. These settings are critical to enable boot support. Make sure to set all fields exactly as shown below.
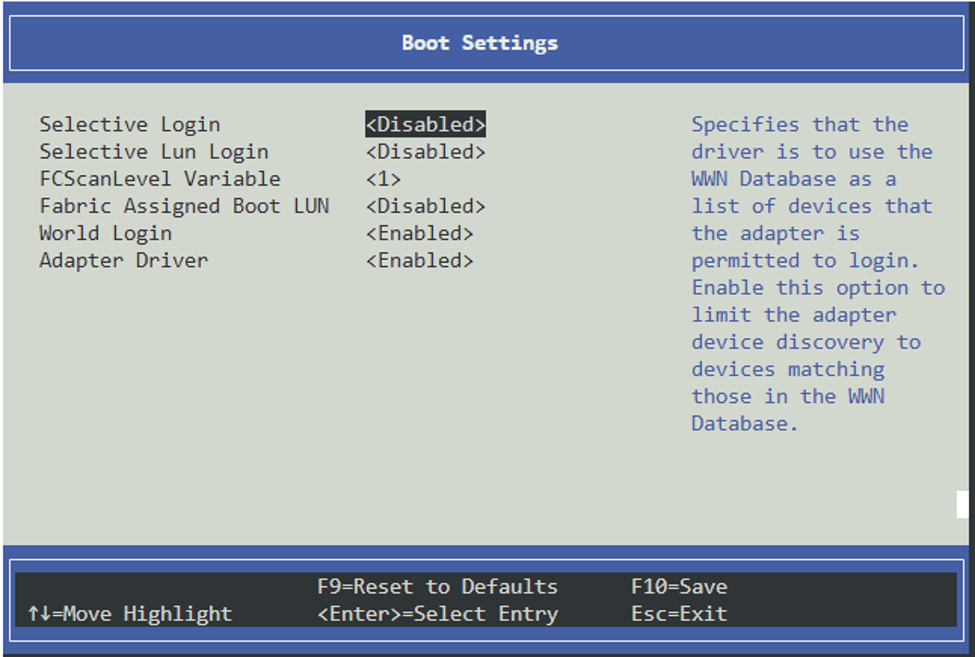
Press Esc to return to the QLogic Setup Utilities home screen.
-
Optional: Open the WWN Database setup menu to configure up to four specific Logical Unit Numbers (LUNs). It is used only when FCScanLevel is set to 0.
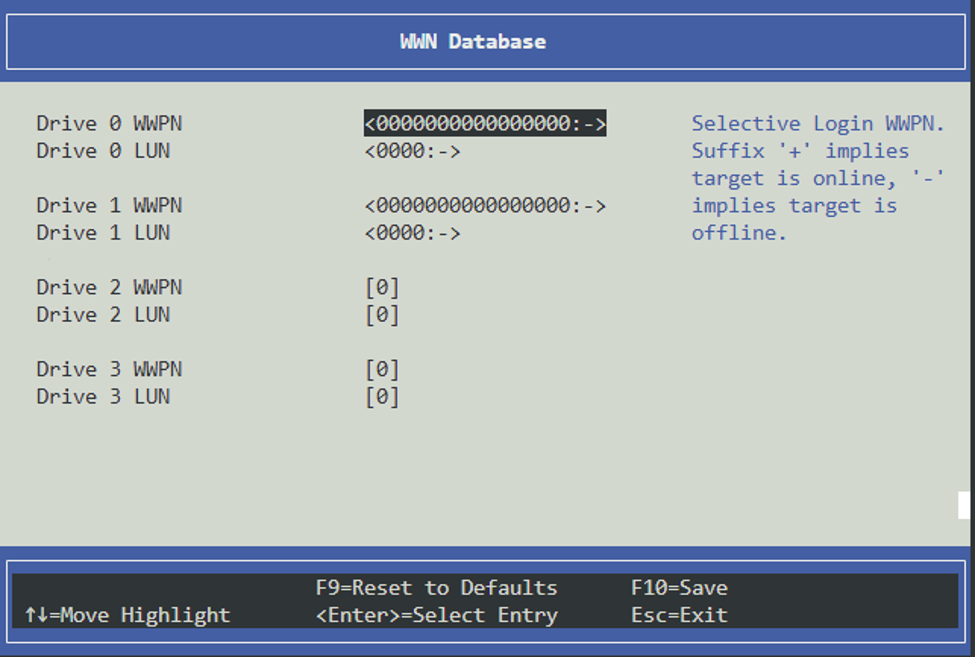
Press Esc to return to the QLogic Setup Utilities home screen.
-
Select Scan Fibre Devices to scan for new Fibre Devices on the Storage Area Network (SAN). Once the devices have been scanned, they can be added to the WWN Database.
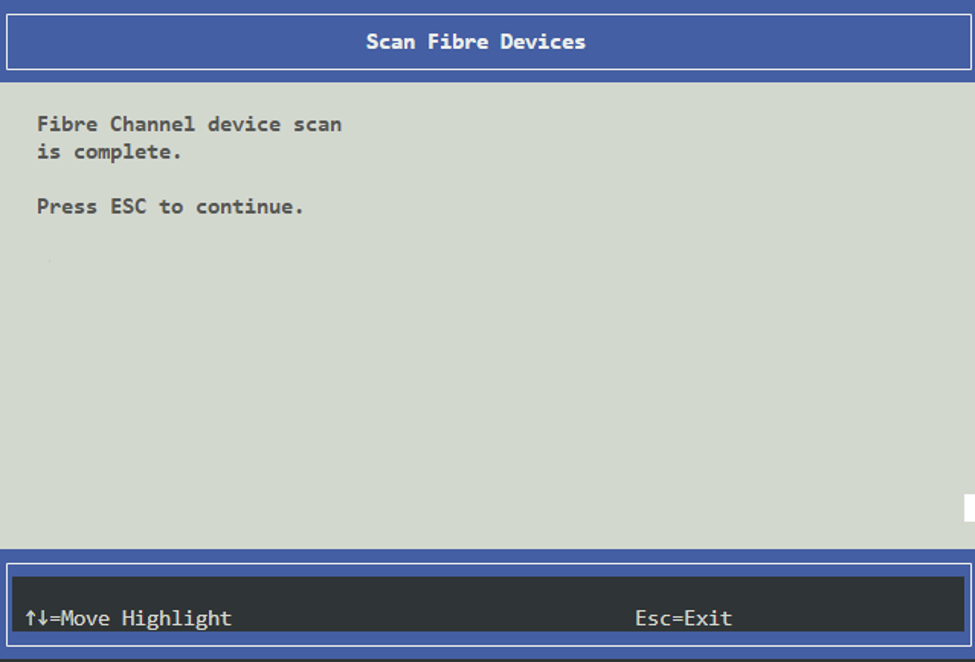
Press Esc to return to the QLogic Setup Utilities home screen.
-
Open the NVME Settings menu and make sure the FC NVME parameter is set to <Disabled>. VSI OpenVMS does not support Non-Volatile Memory Express (NVMe).
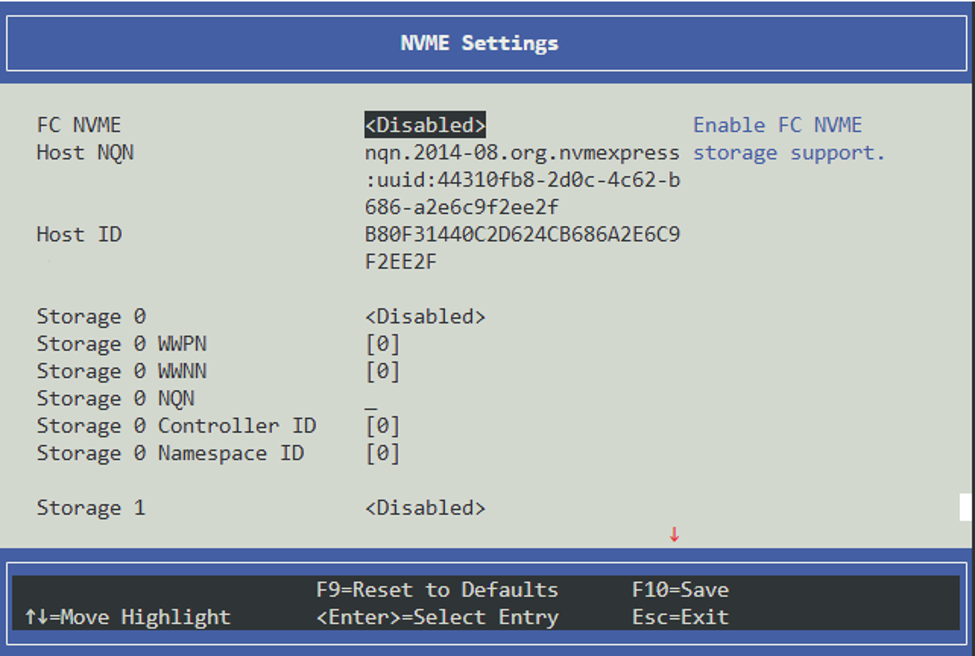
Press Esc to return to the QLogic Setup Utilities home screen.
-
Press F10 to save your changes.
Each Fibre Channel port is configured separately. On a multiport adapter, return to the Device Manager menu by pressing Esc and repeat the setup process for the next port in the list. Make sure all settings are saved back to NVRAM.
-
After you have configured all the ports, press Esc until the UEFI firmware is restarted and you see the
BOOTMGR>prompt again. -
At the
BOOTMGR>prompt, executeDEVICEand find the name of the Fibre Channel disk you wish to boot OpenVMS from. Then issueBOOT device-name.