Connecting to the OpenVMS Console
You can choose to connect to your OpenVMS operator terminal via the Guest Console, a serial port, or a named pipe.
Important
Make sure that the port used by your VM can go through the ESXi firewall. If you are having trouble at this stage, refer to the Configuring Firewall section or contact the ESXi administrator in your company.
-
From your browser, connect to the ESXi Host Client.
-
In the left pane, click Virtual Machines and then, on the right, click the name of the virtual machine where you want to boot OpenVMS. You will see the selected virtual machine configuration details page.
-
Click Power on at the top of the page. Alternatively, click the “play” button (
 ) on the VM browser console preview window to start your virtual machine. The VSI OpenVMS Boot Manager window should appear.
If the Boot Manager window did not open in a pop-up window, try clicking the browser console VM preview window (
 ) or click the Console button above and choose the option that suits your needs: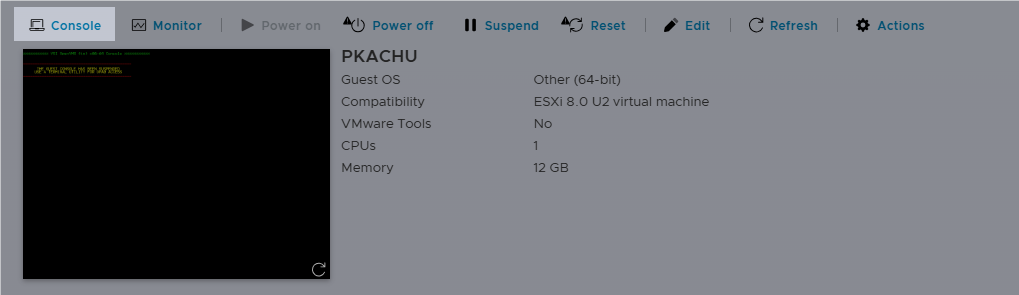
-
At the
BOOTMGR>prompt, execute the following command:BOOTMGR> OPA0For more information about the Guest Console, refer to the VSI OpenVMS x86-64 V9.2-3 Installation Guide and the VSI OpenVMS x86-64 Boot Manager User Guide.
Note
When the connection via the Guest Console is active, it is impossible to connect to the running OpenVMS system using a serial port.
-
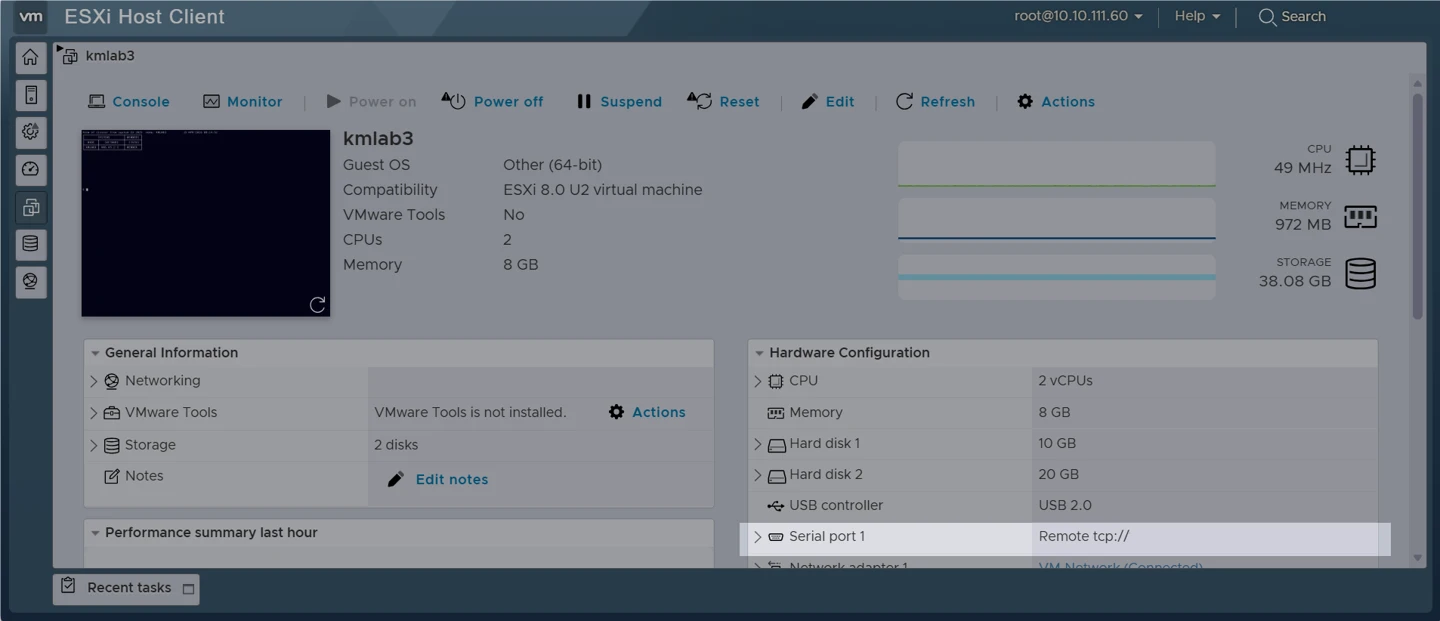
Open your terminal emulator (e.g. PuTTY) and specify the IP address and port of your virtual machine that can be looked up in the ESXi Host Client as shown below:
Note
The following steps contain examples of how to configure the PuTTY terminal emulator.
While VSI tests with PuTTY, other terminal utilities can also be used, but may have different restrictions and incompatibilities.
-
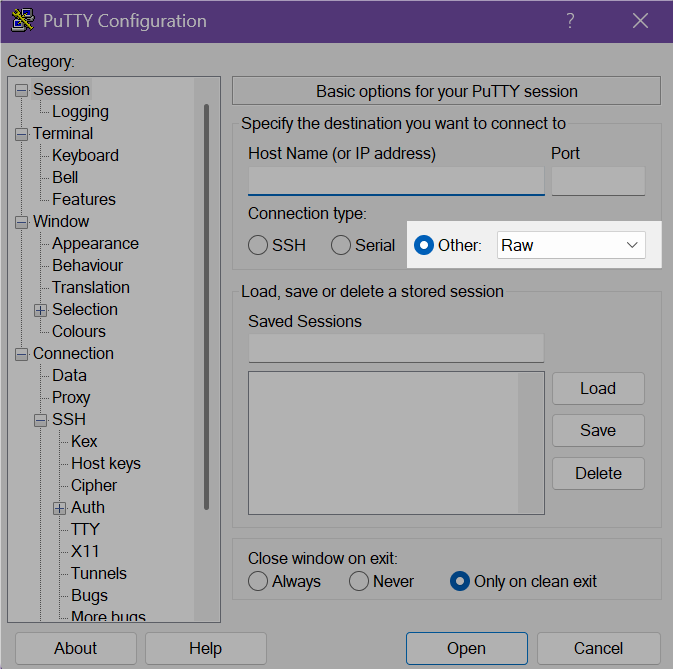
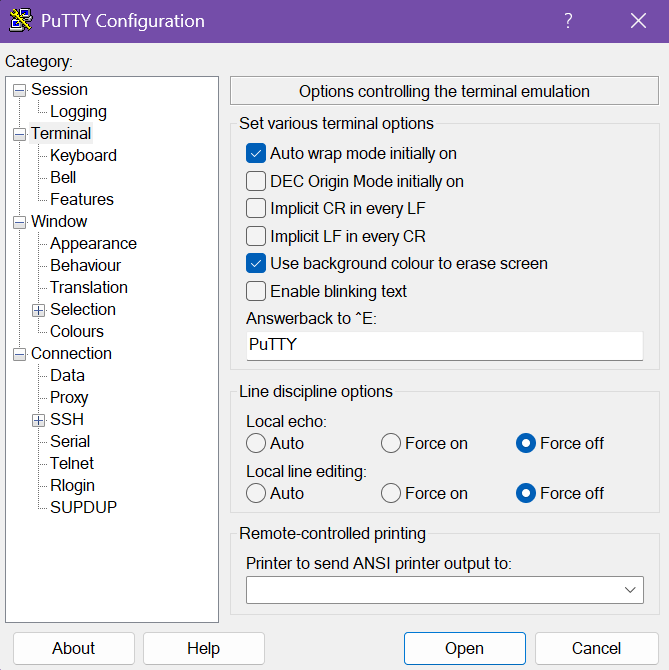
Edit your terminal emulator settings as specified below:
- Connection type: Raw
- Implicit CR in every LF: Unchecked
- Implicit LF in every CR: Unchecked
- Local echo: Force off
- Local line editing: Force off
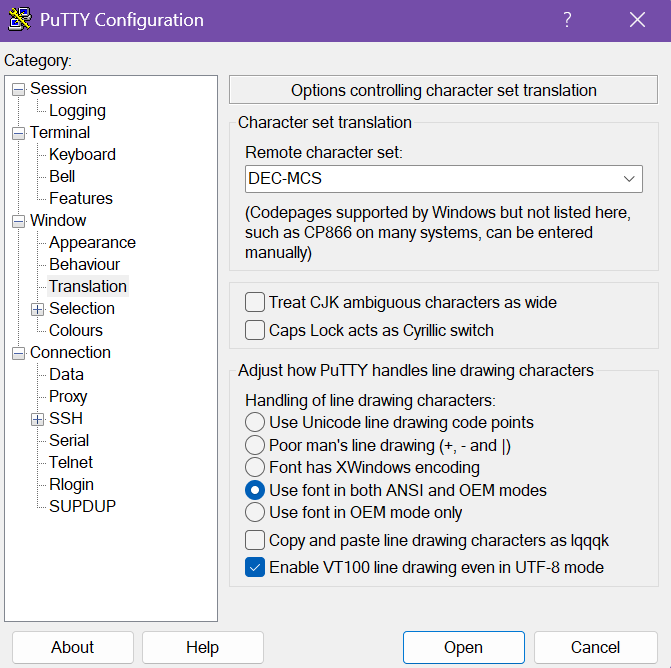
- Remote character set: DEC-MCS
- Enable VT100 line drawing even in UTF-8 mode: Checked
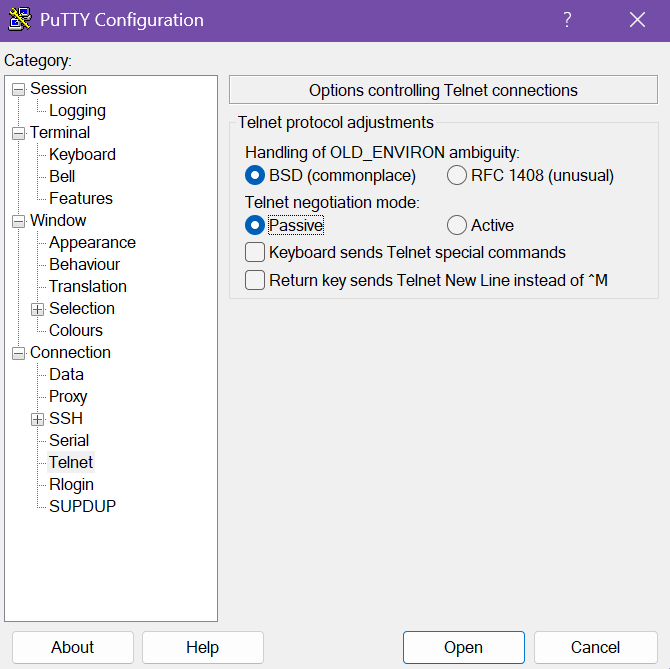
- Telnet negotiation mode: Passive
- Return Key Sends Telnet New Line instead of ^M: Unchecked
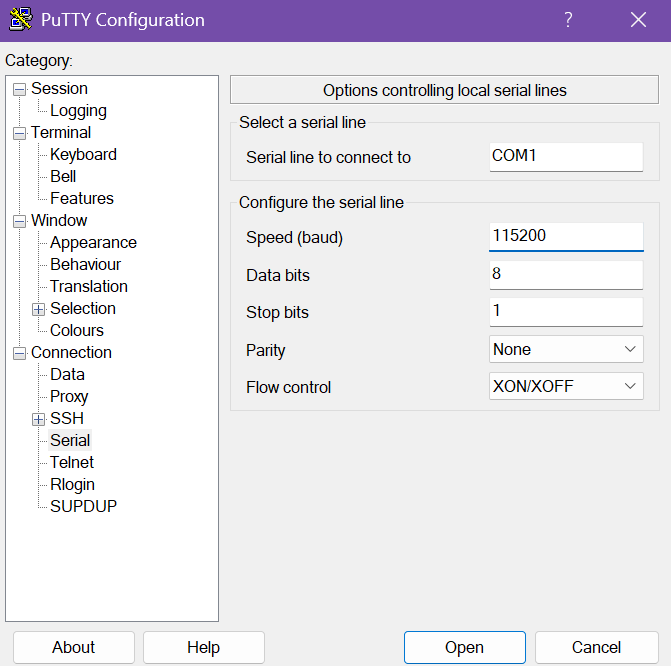
If connecting via a named pipe: - Speed: 115200
- Data Bits: 8
- Stop Bits: 1
- Parity: None
- Flow Control: XON/XOFF
If connecting remotely via SSH through your VPN, make sure that the SSH Port Forwarding is set up in your terminal emulator. 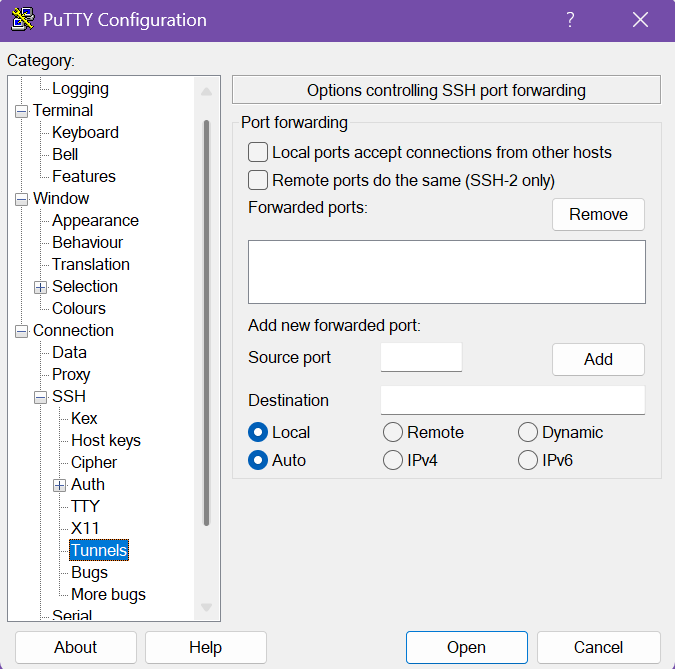
A virtual serial port connected to a named pipe allows access to the OpenVMS console over the network without any physical serial hardware. This is useful when multiple administrators need console access from different systems, or when ESXi is running on hardware without usable serial ports.
A named pipe forms a virtual connection between two virtual serial ports on virtual machines running on the same ESXi host. One of these virtual machines is your OpenVMS system, the other is any other system (e.g. Windows or Linux), from which you will connect to your OpenVMS system.
-
Power off the OpenVMS virtual machine.
-
In the left pane of the ESXi Host Client, click on the virtual machine that will be configured as a server and is a non-OpenVMS system. Then click Edit in the main window. A new pop-up window will open.
-
Add a new serial port by clicking the Add other device tab at the top of the window and selecting Serial port. You will see the New Serial Port category appear among other categories.
a. Choose Use named pipe from the drop-down menu.
b. Specify the pipe name in the following format:
\\.\pipe_namec. Select Server as Near End.
d. Select A virtual machine as Far End.
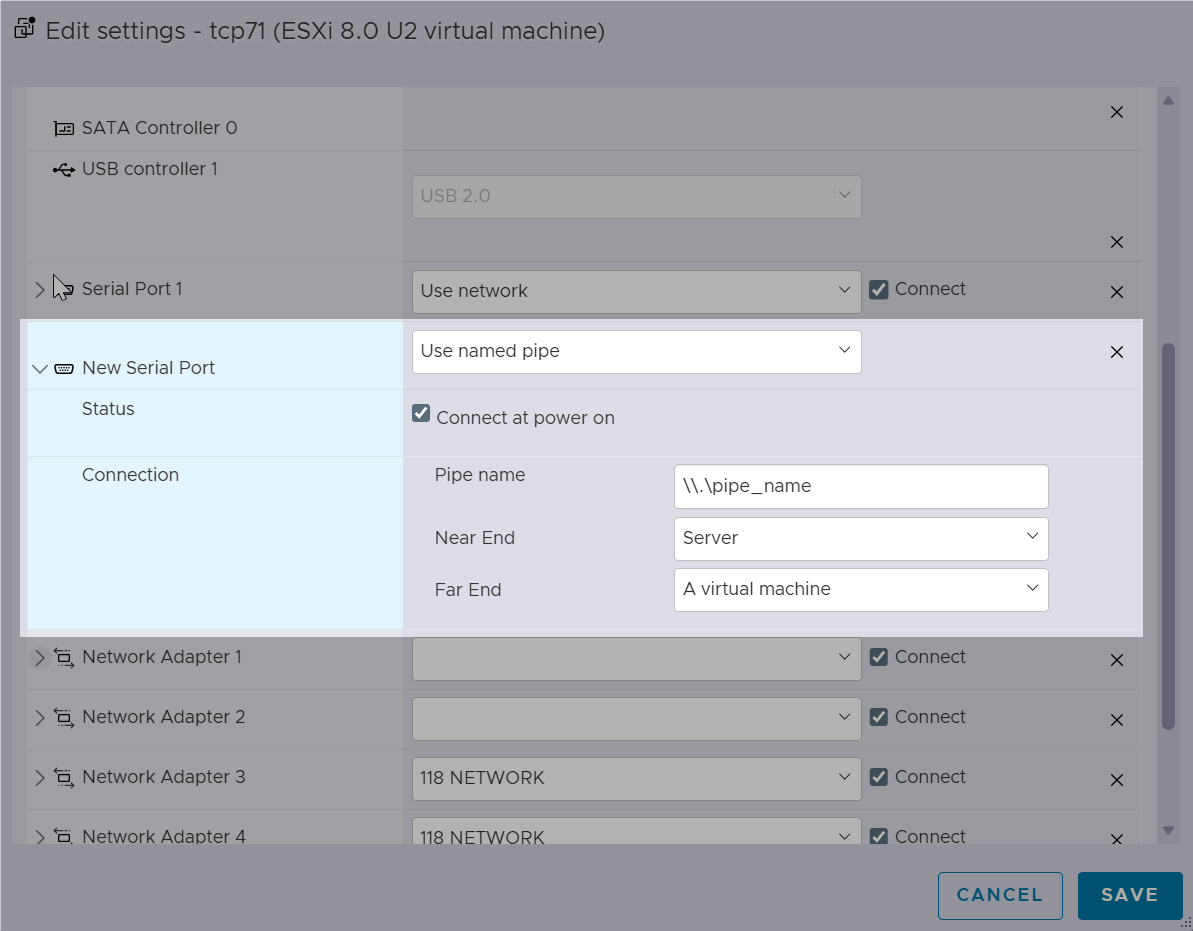
e. Click Save.
-
In the left pane of the ESXi Host Client, click on the virtual machine that will be configured as a client and is an OpenVMS system. Then click Edit in the main window. A new pop-up window will open.
-
Add a new serial port by clicking the Add other device tab at the top of the window and selecting Serial port. You will see the New Serial Port category appear among other categories.
a. Choose Use named pipe from the drop-down menu.
b. Specify the same pipe name as for the server side in the following format:
\\.\pipe_namec. Select Client as Near End.
d. Select A virtual machine as Far End.
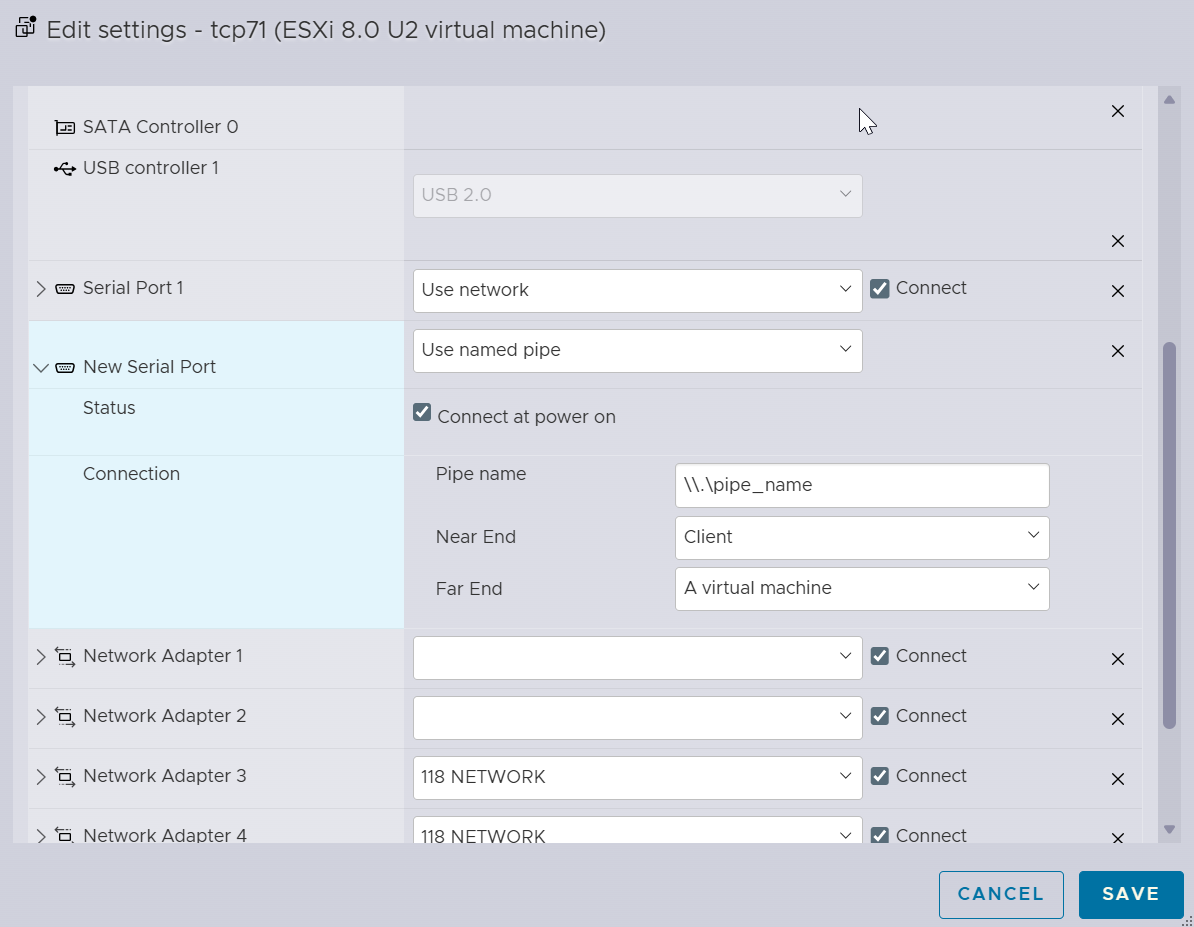
e. Click Save.
-
Access the console on the OpenVMS system by first logging in to the server system and then using the terminal emulator to establish a connection to the OpenVMS system via the serial port as described earlier in Connecting to the OpenVMS Console.
Using the named pipe functionality, map COM1/OPA0: on the OpenVMS system to a pipe on the server system on which a terminal emulator is installed.