Adding Disks to Your ESXi VM
-
Open your virtual machine configuration page by clicking Virtual Machines and selecting your VM from the list.
-
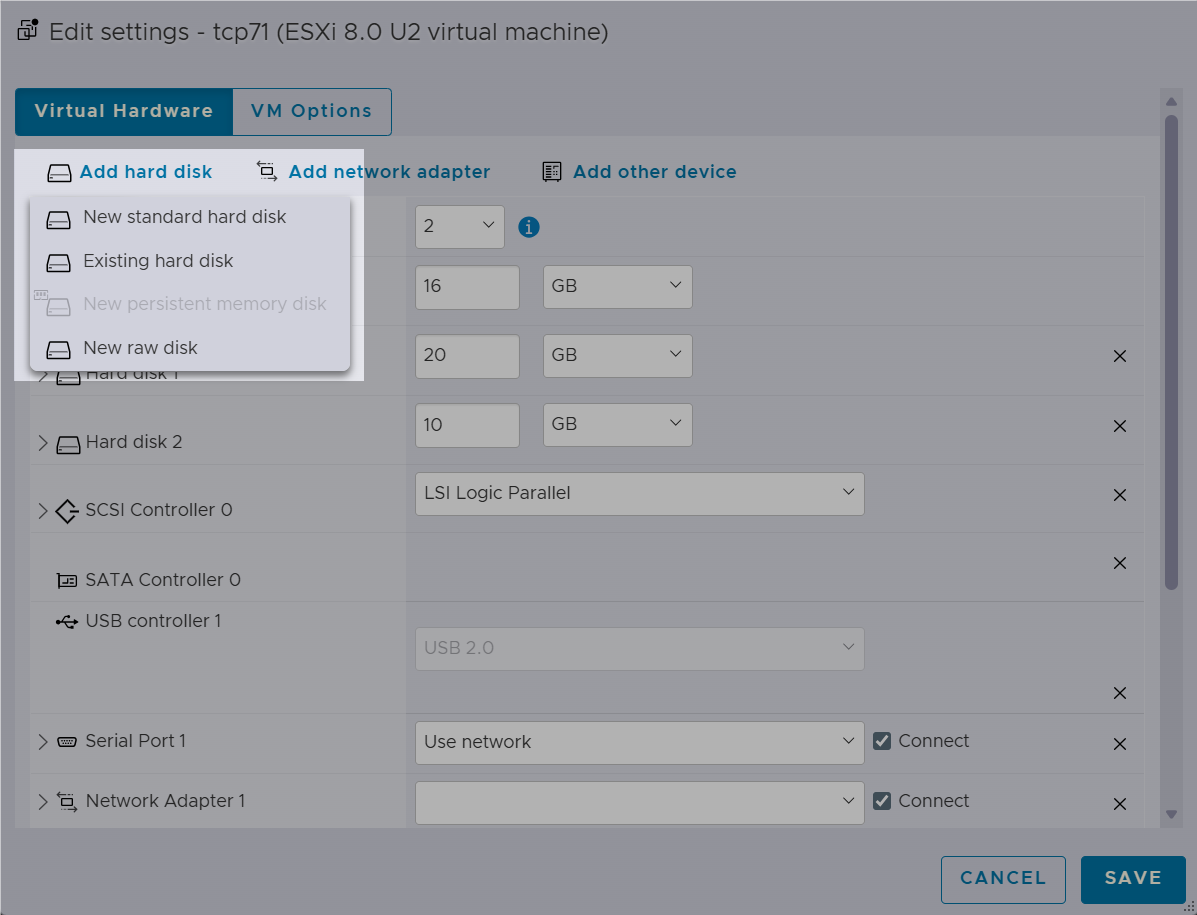
On your virtual machine configuration page, click Edit. In the Edit Settings window, click Add Hard Disk and select New standard hard disk or Existing hard disk.
-
If you have selected New standard hard disk, a New Hard Disk category will appear in the list settings.
-
Expand the category and make sure that Disk Provisioning is set to Thick-provisioned, lazily zeroed.
-
Specify the amount of storage space to allocate to your new hard disk and proceed to Step 3.
Restriction
Volumes larger than 1.98 TB are not supported on VSI OpenVMS.
-
-
If you have selected Existing hard disk, a pop-up window will open where you can select a hard disk that you wish to use with your VM.
-
Locate a hard disk that is not used by any other virtual machine.
-
Click Save and proceed to Step 3.
-
-
-
Assign the appropriate controller to the disk using the drop-down menu in the Controller location field. Match the controller type to the OpenVMS recommendations for your release and your environment needs.
-
Click Save.
Tip
ESXi supports exclusively VMDK disks. To learn how to convert a different-format disk into .vmdk, refer to the Converting Hypervisor Images article.