Configuring VMware ESXi Firewall
Configure the ESXi firewall to be able to connect to your OpenVMS VM via a serial port or SSH.
To do so, you will need to connect to the ESXi host command-line interface.
Connecting to the ESXi Command-Line Interface
-
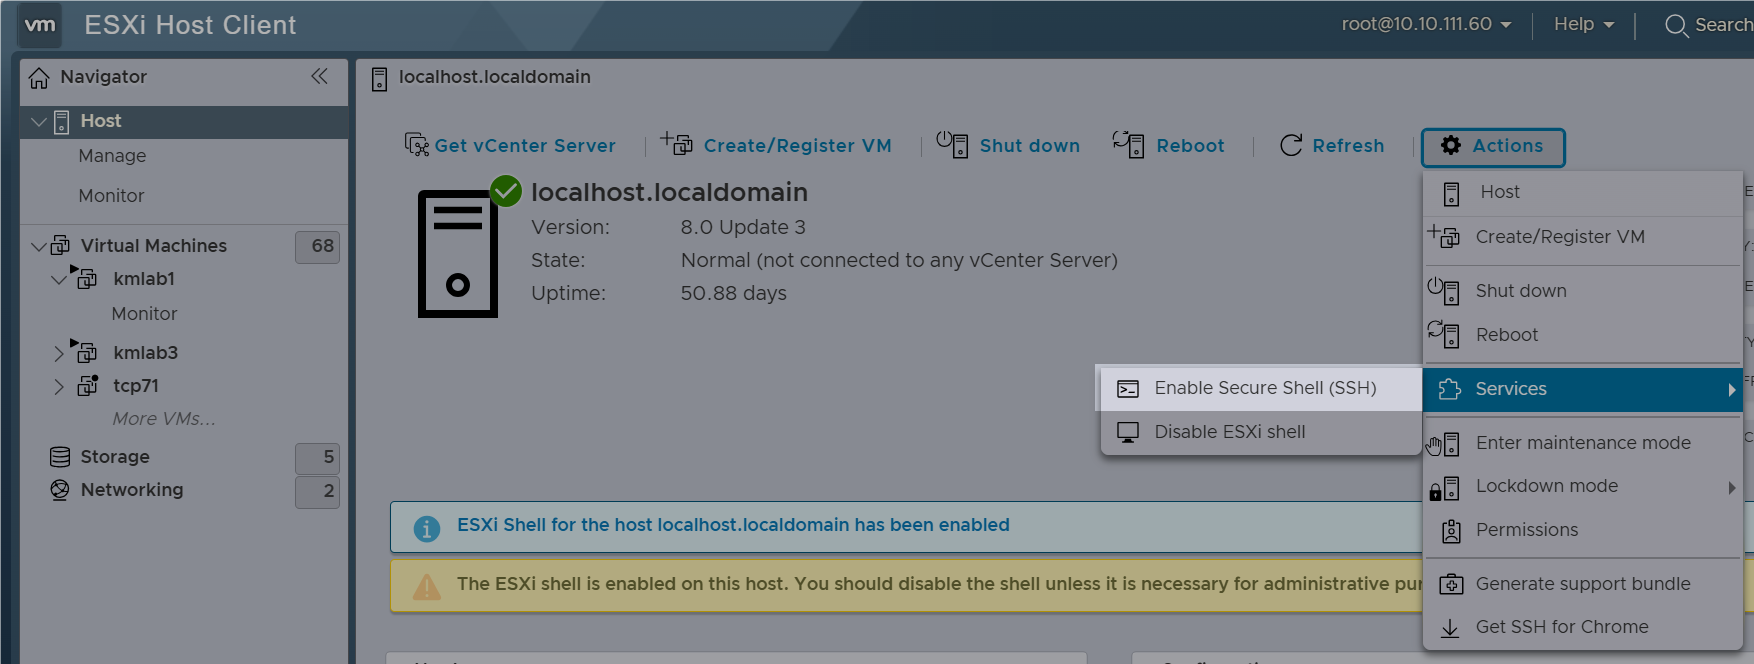
In the left pane of the ESXi Host Client window, click on your virtual machine, then click Actions > Services > Enable Secure Shell (SSH) in the main window.
-
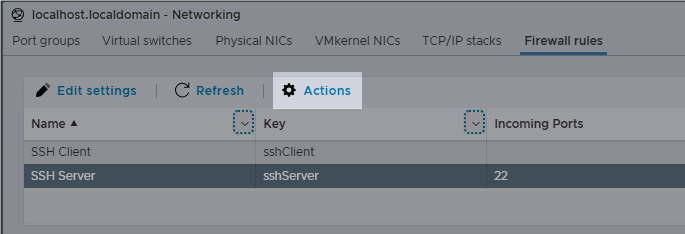
In the left pane of the ESXi Host Client window, click Networking. Then click the Firewall rules tab in the right pane.

-
In the ruleset list, select SSH Server (or TSM-SSH, depending on the ESXi version) and click the Actions button. Select Enable.
-
You will now be able to connect to the ESXi host CLI using the following command:
ssh root-user@esxi-host-ip-address
-
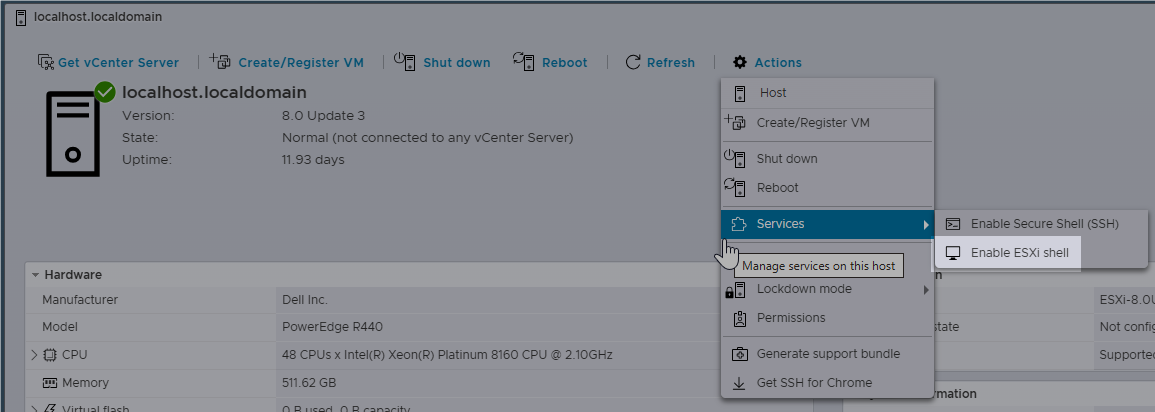
In the left pane of the ESXi Host Client window, click on your virtual machine, then click Actions > Services > Enable ESXi Shell in the main window.
-
You will now be able to connect to the ESXi host CLI via a direct SSH connection.
Editing Configuration Files
First, you will need to edit the XML file to allow connection via the desired ports. Then apply the changes and make sure they are persistent after reboot.
-
You can view the existing XML files containing the firewall rules under
/etc/vmware/firewall/. -
Use the syntax from the existing files to create your own rules in
/etc/rc.local.d/local.shusing the following command:vi /etc/rc.local.d/local.shFor basics on how to use the Vi editor, refer to the Introduction to the Vi editor article.
-
Enclose your custom firewall rules into the following lines:
/bin/cat > /etc/vmware/firewall/custom-rules-filename.xml << EOF
.
.
.
your-custom-rules
.
.
.
EOF
The rules should look similar to the following:
<ConfigRoot>
    <service>
        <id>ruleset-name</id>
            <rule id='0000'>
                <direction>inbound</direction>
                <protocol>tcp</protocol>
                <porttype>dst</porttype>
                <port>
                    <begin>5140</begin>
                    <end>5146</end>
                </port>
            </rule>
            <rule id='0001'>
                <direction>inbound</direction>
                <protocol>udp</protocol>
                <porttype>src</porttype>
                <port>2055</port>
            </rule>
        <enabled>true</enabled>
        <required>false</required>
    </service>
</ConfigRoot>
Tip
- Allowed
directionvalues:inboundoroutbound. - Allowed
protocolvalues:tcporudp. - Allowed
porttypevalues: destination (dst) or source (src). Portvalues can be specified as a range using the<begin>and<end>elements or as a single value.
- Allowed
-
Add the following command at the end of the
/etc/rc.local.d/local.shfile:/sbin/esxcli network firewall refresh -
Run the startup script for the changes to take effect:
/bin/sh /etc/rc.local.d/local.sh -
Confirm that the custom firewall rules have been enabled:
esxcli network firewall ruleset list | grep ruleset-nameYou should see
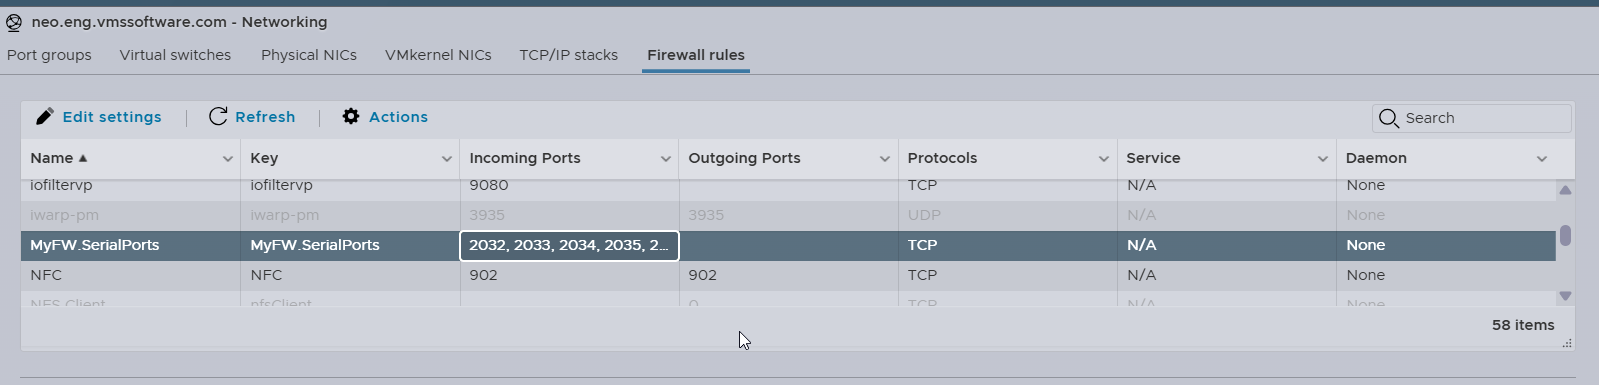
truein theEnabledcolumn next to your custom ruleset name.In the ESXi Host Client, you should see your new rule in the list of rules in Networking > Firewall rules.